Loom lighting for the Toika "Liisa" countermarche loom
Sally Byers (sally@threadwitch.com)
Sally Byers (sally@threadwitch.com)

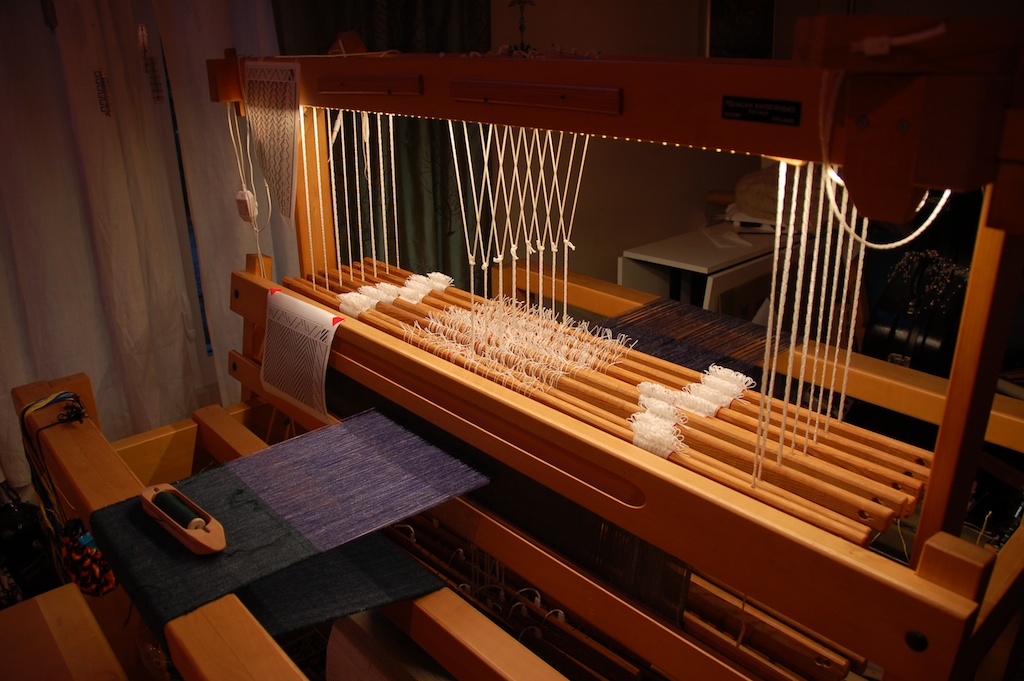
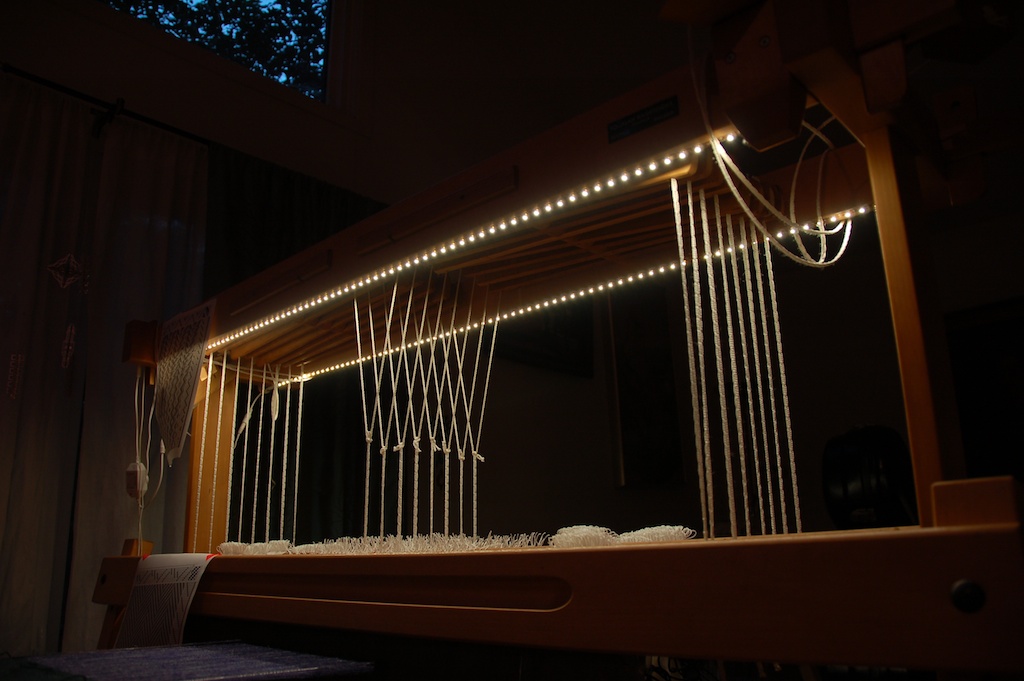
These instructions describe the steps involved in adding a simple but useful lighting modification to a Toika "Liisa" countermarche loom. The general approach will work with any countermarche loom, as well as other types of loom that have a castle or other horizontal component over the harnesses.
The key to this modification is a new sort of strip light that consists of a ribbon with pressure sensitive adhesive on one side and small but bright LEDs embedded on the other side. In essence, it is a strip of tape that lights up when you apply power to it. LEDs have several advantages over other forms of strip lighting, such as rope lights, but the biggest advantage is that they do not give off any appreciable amount of heat. They run at low voltage (typically 12V), so there is no danger of getting an electric shock while installing or using them.
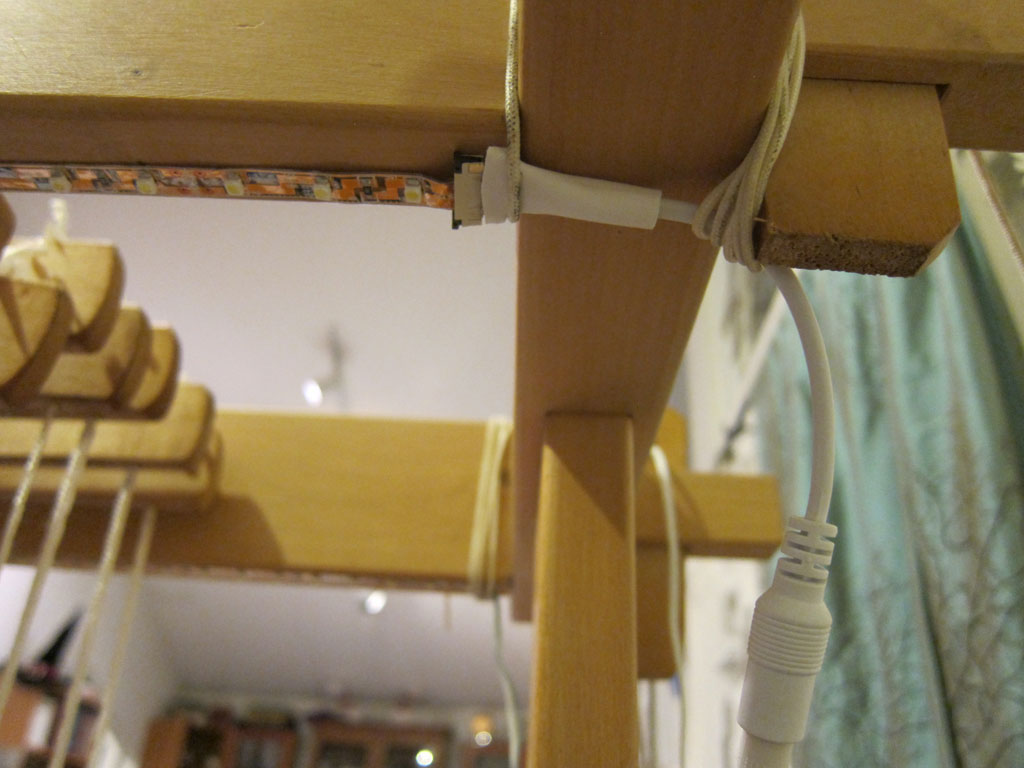
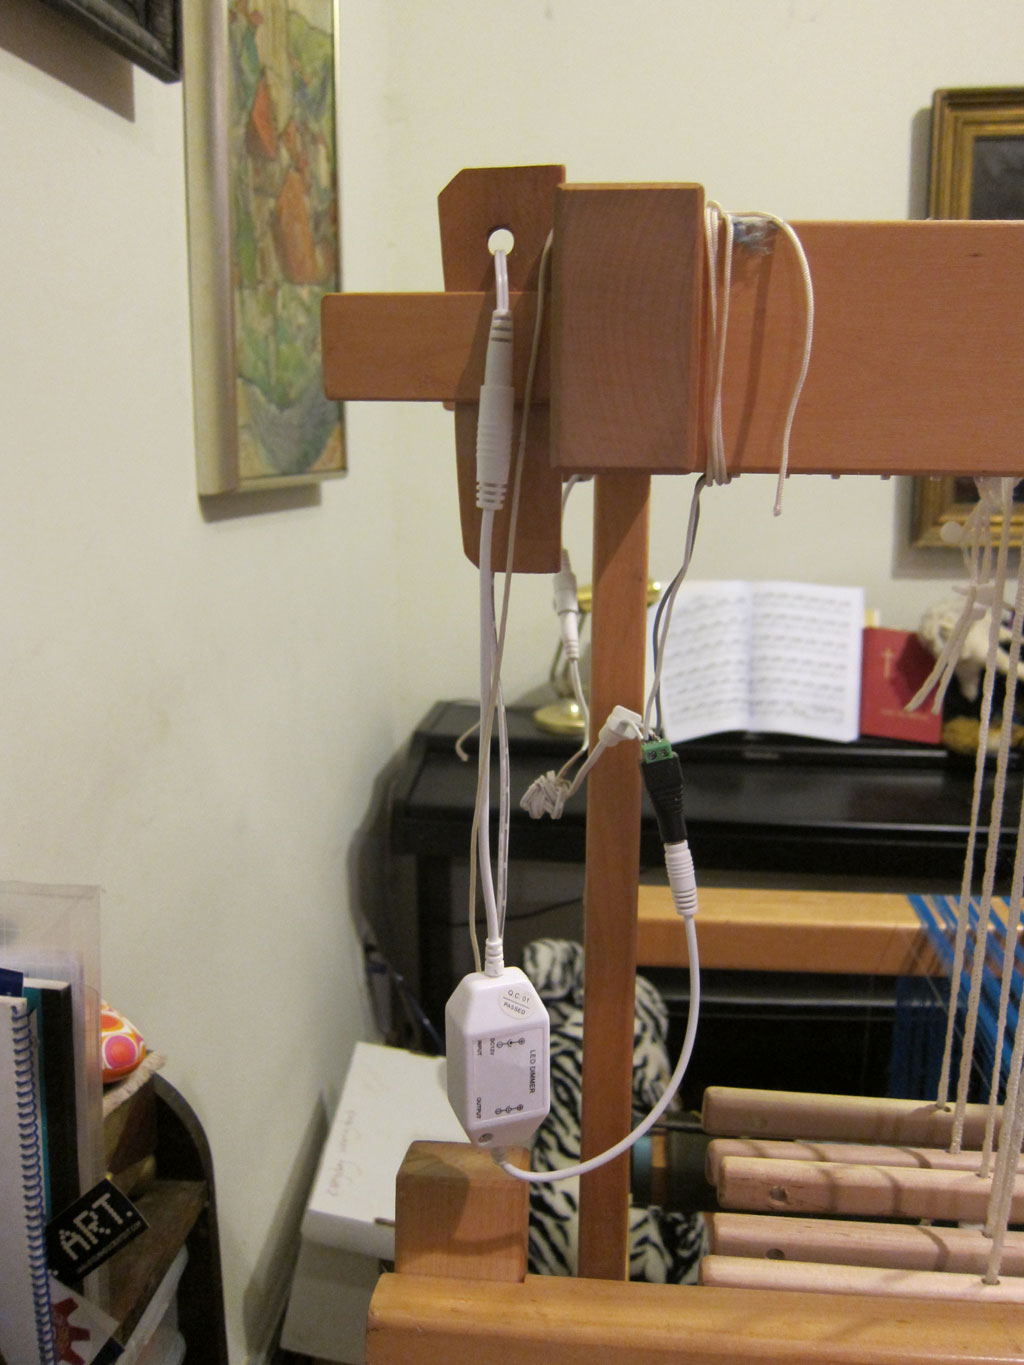
And here are some close-ups of how the pieces are connected. This was a quick installation, so some of the wires are simply tied directly onto the loom. However, this arrangement has worked fine for over a year without requiring anything fancier. Both strings of LEDs are connected to the dimmer using the connectors that came in the kit. No soldering is necessary, just a small screwdriver.
The AC adapter plugs into the dimmer. The other side of the dimmer plugs into a connector with screw terminals, which in turn is connected to two pairs of wires, one for each strip of LEDs. Make sure to match up the + and - markings, but don't worry if you get it backwards. If you wire an LED strip backwards by mistake, it won't light but it won't damage anything, so try it the other way around.